To build a DIY home-energy monitor with an ESP32, start by gathering essential components like the ESP32 board, current sensors, resistors, and wiring tools. Connect the sensors securely to the ESP32, ensuring proper wiring and signal conditioning for accuracy. Assemble everything into a durable enclosure and program the ESP32 to collect and transmit power data. For visualization and further customization, explore data tools. Keep exploring to discover tips that improve your energy monitor’s performance.
Key Takeaways
Gather and connect compatible current, voltage, and environmental sensors to the ESP32, ensuring secure wiring and proper signal conditioning.
Calibrate sensors thoroughly to ensure accurate energy consumption measurements before full system deployment.
Design a durable, weatherproof enclosure to protect electronics from dust, moisture, and physical damage.
Use stable, regulated power supplies and insulated wiring for safety and long-term reliability.
Implement error handling, environmental protections, and modular code for system stability and ease future upgrades.
Gathering Necessary Components and Tools
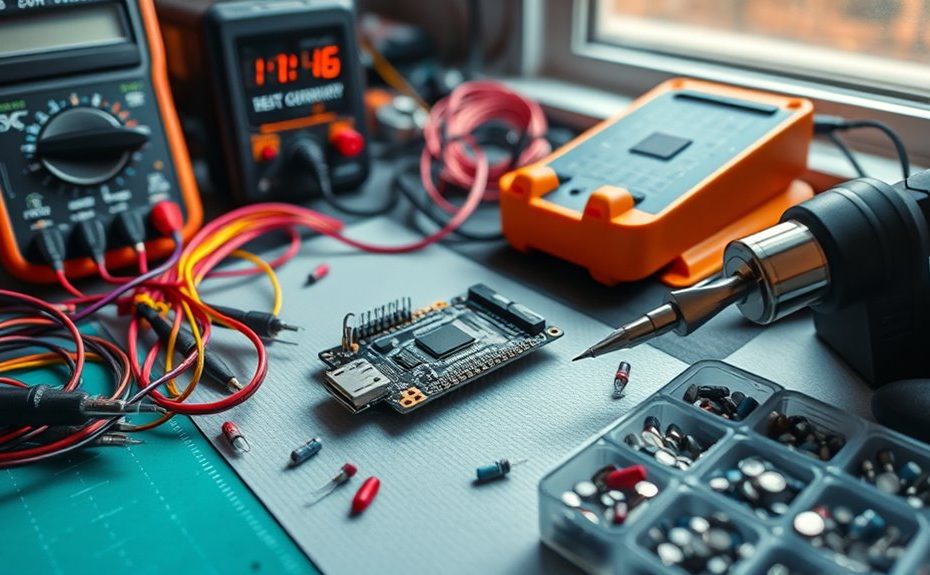
Before you begin building your DIY home-energy monitor with the ESP32, you need to gather all the necessary components and tools. Start with an ESP32 development board, which serves as the core of your project. You’ll also need current sensors, like SCT-013, to measure power consumption. A breadboard and jumper wires are essential for easy connections. Don’t forget a USB cable for programming and power. A multimeter helps verify connections and troubleshoot. You might also want a soldering iron if you plan to create more permanent connections. Additional tools include wire strippers and tweezers for handling small parts. Double-check that you have all these components before starting to avoid interruptions. Gathering everything beforehand ensures a smooth build process and saves you from unnecessary delays. Incorporating efficient components can further enhance your project’s performance and longevity.
Connecting Sensors to the ESP32
Connecting sensors to your ESP32 involves understanding which types are compatible and how to wire them properly. You’ll also need to take into account signal conditioning to ensure accurate readings, along with calibration and testing to verify your setup. You can also consider high-performance tuning options to optimize your sensor integration, ensuring your energy monitor functions accurately and efficiently. Let’s explore these points to get your energy monitor up and running smoothly.
Sensor Types and Compatibility
The ESP32 supports a wide variety of sensors, making it versatile for home-energy monitoring projects. You can choose sensors based on your specific needs. Here are three common types:
Current Sensors (e.g., SCT-013, SCT-016) for measuring power consumption.
Voltage Sensors (like voltage dividers or dedicated modules) to monitor line voltage.
Temperature and Humidity Sensors (such as DHT22 or BME280) for environmental data.
When working with sensors, it’s important to consider sensor specifications to ensure compatibility with the ESP32’s voltage levels and communication protocols, like I2C, SPI, or ADC. Selecting the right sensors simplifies integration and improves accuracy. Check sensor specifications to confirm compatibility before connecting them to your ESP32 project.
Wiring and Signal Conditioning
To guarantee accurate readings from your sensors, proper wiring and signal conditioning are essential when connecting them to the ESP32. Use shielded cables for sensitive signals to reduce noise. Ensure sensors are powered correctly with appropriate voltage levels, and connect grounds securely. Signal conditioning might involve adding resistors, voltage dividers, or filters to match sensor outputs to the ESP32’s input range. Here’s a quick overview:
Step
Action
Purpose
Proper wiring
Connect sensors to designated pins
Prevent false readings
Voltage regulation
Use resistors or dividers as needed
Match signal levels to ESP32
Shielding and filtering
Add capacitors or shielding
Minimize electrical noise
Accurate measurements
Ensure calibration and proper setup
Achieve reliable data
Calibration and Testing
Before you begin calibrating and testing your sensors, it’s crucial to verify they are properly connected to the ESP32. Ensuring solid connections prevents errors during calibration and helps you get accurate readings. To get started, focus on these key steps:
Double-check wiring – Confirm that each sensor’s pins match the ESP32’s input pins and are securely connected.
Power supply validation – Make sure sensors receive the correct voltage and current to operate reliably.
Test sensor response – Run simple code snippets to verify sensors output expected signals before proceeding with calibration.
Understand AI-driven innovations in sensor technology to improve your energy monitoring setup.
Performing these steps guarantees your hardware setup is solid, allowing you to calibrate sensors accurately and ensure reliable energy monitoring for your home project.
Setting Up the Hardware Assembly
Start by choosing the right components to guarantee your monitor works reliably. Then, carefully wire everything according to your schematic, double-checking connections as you go. Finally, assemble the setup inside an enclosure to protect the electronics and keep your project neat. Incorporate proper calibration techniques to ensure accurate energy measurements.
Selecting Components Carefully
Choosing the right components is essential for a reliable and accurate DIY home-energy monitor with the ESP32. Selecting quality parts guarantees precise measurements and long-term durability. Focus on these key areas:
Current Sensors: Choose accurate, high-quality current transformers or Hall-effect sensors to measure power consumption reliably. Essential Oils can be used to create a calming environment during setup, ensuring focus and relaxation.
Voltage Dividers: Use precision resistors for voltage measurement, avoiding inaccuracies that can affect readings.
Power Supply: Select a stable, regulated power source compatible with the ESP32, preventing voltage fluctuations that could impact performance.
Wiring and Connections
Setting up the hardware connections carefully is crucial to guarantee accurate readings and safe operation. Begin by double-checking your wiring diagram before connecting components. Connect the current sensors to the main power lines, ensuring they are securely clamped around the conductors without any loose strands. Attach the voltage divider circuit to the AC mains, taking care to insulate all exposed wiring thoroughly. Link the sensor outputs to the ESP32’s input pins, matching each wire correctly to avoid misreads. Use proper grounding techniques to prevent noise interference. Keep signal wires away from high-voltage lines to reduce interference. Finally, verify all connections are tight and insulated before powering up the system. Meticulous wiring ensures reliable data collection and reduces the risk of short circuits or component damage. Additionally, following safety regulations during setup helps prevent hazards and ensures compliance.
Assembling Enclosure
To guarantee your hardware remains protected and organized, assembling the enclosure correctly is essential. First, ensure all components fit snugly inside the enclosure, avoiding loose wires or pressure points. Next, secure the ESP32, sensors, and other modules with screws or mounting brackets to prevent movement. Finally, double-check all connections before sealing the enclosure. Here’s what to focus on:
Properly position components to allow airflow and easy access for adjustments.
Use screw terminals or connectors for tidy, reliable wiring.
Seal the enclosure tightly to protect against dust, moisture, and electrical interference.
Consider sound vibrations when designing the enclosure to minimize resonance that could affect sensitive components.
Taking these steps ensures durability and safeguards your energy monitor against environmental factors. Proper assembly simplifies troubleshooting and future upgrades, making your project more reliable.
Programming the ESP32 for Energy Data Collection
Programming the ESP32 for energy data collection involves writing efficient code that interfaces with sensors and transmits data to your preferred platform. You’ll need to set up sensor reading routines, manage Wi-Fi connectivity, and guarantee reliable data transmission. Use libraries like Arduino or ESP-IDF to streamline development. Focus on optimizing code for low power consumption and accurate readings. Consider implementing error handling and data buffering to prevent data loss. Keep your code modular to facilitate troubleshooting and future updates. Below is a quick overview of key components:
Component
Function
Sensor Interface
Reads voltage/current data
Wi-Fi Module
Transmits data to cloud/server
Data Processing
Converts raw data into usable info
Power Management
Ensures efficient energy use
Error Handling
Maintains system reliability
Additionally, understanding power management techniques helps optimize energy use in your project.
Visualizing and Analyzing Power Usage Data
Once your ESP32 collects power usage data, visualizing and analyzing it becomes essential for understanding your energy patterns. This step helps you identify peak usage times, detect inefficiencies, and track improvements over time. To get started, consider these key approaches:
Visualize and analyze your ESP32 power data to identify peaks, inefficiencies, and trends over time.
Use data visualization tools like Grafana or Excel to create real-time graphs and charts, making patterns easier to spot.
Set up dashboards that display instant power consumption metrics, helping you monitor changes instantly.
Analyze historical data to find trends, peaks, and anomalies, guiding you to optimize your energy usage.
Tips for Enhancing and Customizing Your Monitor
Enhancing and customizing your home-energy monitor allows you to tailor it to your specific needs and improve its accuracy. Start by adjusting calibration settings to match your local power supply, ensuring precise readings. You can also add additional sensors to monitor other electrical parameters or different circuits in your home. Upgrading your display, such as incorporating an OLED or TFT screen, makes data easier to read at a glance. Consider programming custom alerts for unusual power consumption, helping you identify issues early. Integrate cloud services or mobile notifications to stay updated remotely. finally, tweak the firmware to add features like historical data logging or energy cost calculations. These enhancements make your monitor more functional and personalized, giving you better insights into your energy usage.
Frequently Asked Questions
How Accurate Is the Energy Measurement With This DIY Setup?
You might wonder about the accuracy of your DIY energy monitor. It depends on the components you use, like sensors and calibration methods. High-quality sensors with proper calibration can give you measurements within 5-10% accuracy. Keep in mind, some minor errors may occur due to noise or component tolerances. Regular calibration and good wiring practices help improve your setup’s accuracy, giving you reliable energy data for your home.
Can This System Monitor Multiple Circuits Simultaneously?
Imagine a control panel with blinking LEDs and circuit wires snaking across your wall, each representing a different part of your home. With your ESP32 system, you can monitor multiple circuits at once, capturing real-time energy data from each. By connecting sensors to various circuits, you create a thorough view of your home’s power use, allowing you to spot inefficiencies and save energy across your entire household.
What Is the Power Consumption of the ESP32 Itself?
Your current question focuses on the ESP32’s power consumption. The ESP32 typically consumes around 240-600 milliamps when active, depending on workload. In deep sleep mode, it drops to about 10-20 microamps, markedly saving power. If you’re designing a battery-powered device, you’ll want to optimize sleep modes. Keep in mind, the actual consumption varies based on Wi-Fi, Bluetooth activity, and processing tasks.
How Do I Calibrate the Sensors for Precise Readings?
To calibrate your sensors for precise readings, start by comparing their output with a known reference or standard. You’ll want to record baseline readings and adjust your sensor’s calibration factor or gain in your code accordingly. Make small adjustments, then verify results under different conditions. Regularly recalibrate to account for sensor drift, ensuring your measurements stay accurate over time. This process helps you get reliable, consistent data from your energy monitor.
Is There a Way to Remotely Control or Reset the Monitor?
Imagine your monitor as a trusty ship, ready to sail smoothly with a simple command. Yes, you can remotely control or reset it using Wi-Fi. Set up a web server or use MQTT to send commands from your device. When you need a fresh start or quick control, just send the reset command, and your monitor will restart or respond, keeping your energy tracking shipshape without ever needing to leave your couch.
Conclusion
With your DIY home-energy monitor, you’ve mastered the magic of monitoring, measuring, and managing your home’s energy. By blending basic components with bold brainstorming, you create a custom, cost-effective control center. Keep experimenting, exploring, and expanding your setup to enhance efficiency. Remember, the key is curiosity and consistency—your clever customization can continuously cut costs and conserve resources. Stay passionate, persistent, and proud of your personalized power project!