To install a smart thermostat, start by turning off your HVAC power and carefully removing your old thermostat, labeling wires to guarantee correct reattachment. Connect the new thermostat according to the manufacturer’s instructions, mounting it securely on the wall. Once wired, turn the power back on, connect the device to Wi-Fi, and follow setup prompts on the app. If you continue, you’ll discover detailed steps to make your smart thermostat work perfectly for your home.
Key Takeaways
Turn off HVAC power and carefully remove the old thermostat, labeling wires for correct reconnection.
Check compatibility with your heating and cooling system before purchasing and installing the smart thermostat.
Connect wires accurately, using adapters if needed, and securely mount the device level on the wall.
Power on the system, then follow setup prompts to connect the thermostat to Wi-Fi and download the app.
Complete the guided setup to enable remote control, scheduling, and energy management features.
Installing a smart thermostat is a practical upgrade that can help you save energy and enhance your home’s comfort. It allows you to control your heating and cooling systems more efficiently, leading to lower energy bills and a more consistent indoor environment. Before you get started, it’s important to consider your current HVAC setup and ensure your new smart thermostat will work seamlessly with your existing system. Compatibility issues can be a common obstacle, especially with older or less common systems. Checking the specifications of the thermostat and consulting your HVAC manufacturer’s guidelines can save you time and frustration. Many smart thermostats are designed to be compatible with a wide range of systems, but double-checking compatibility ensures you won’t face unexpected hurdles during installation.
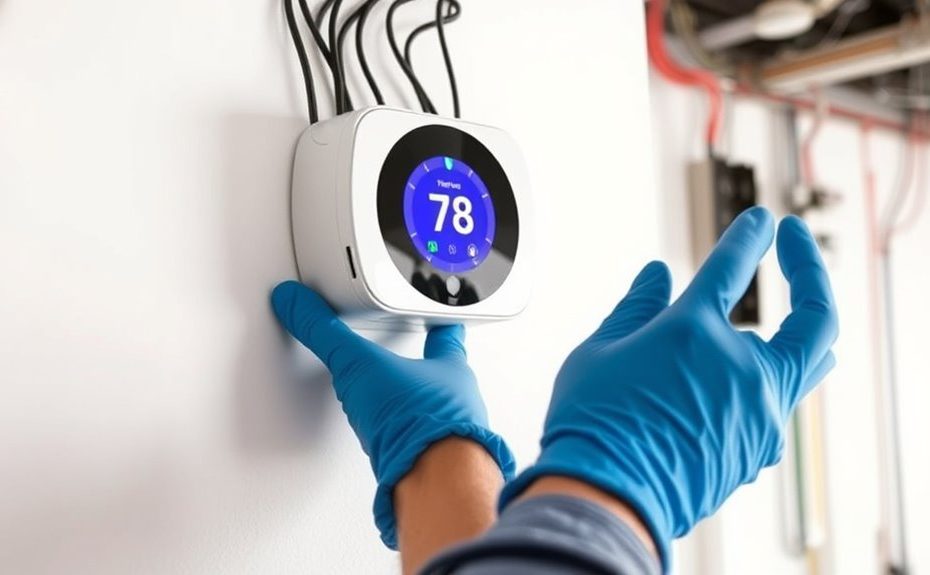
Once you’ve confirmed your system’s compatibility, it’s time to turn off power to your HVAC unit to prevent electrical mishaps. Removing your old thermostat is straightforward but requires careful handling. Disconnect the wires and label them if needed, so you know where they go on the new device. This step is vital because improper wiring can lead to malfunction or damage. Following the manufacturer’s instructions closely will help you connect everything correctly. Many smart thermostats feature a simple wiring process, but some may require additional adapters or wiring upgrades, especially if your system is atypical. Additionally, understanding the heating and cooling system in your home can help ensure proper installation and operation of your new thermostat.
After wiring, mount the new thermostat on the wall, ensuring it’s level and secure. Many models come with detailed instructions or mounting templates that make this process easier. Once installed, turn the power back on and follow the setup prompts. Most smart thermostats connect via Wi-Fi, so you’ll need your network information to complete the installation. During setup, you’ll typically download an app and follow guided steps to link the thermostat to your phone or tablet. This connection is key for remote control, scheduling, and energy management features.
Frequently Asked Questions
Can I Install a Smart Thermostat Myself?
Yes, you can do a DIY installation of a smart thermostat if you’re comfortable with basic wiring and follow the instructions carefully. Before starting, review troubleshooting tips to handle common issues like wiring errors or connectivity problems. Turn off power to your HVAC system first, then connect the wires as directed. Take your time, double-check connections, and consult online guides or support if you encounter any difficulties.
What Brands Are the Most Compatible?
Did you know that over 70% of smart thermostats are compatible with multiple heating and cooling systems? When choosing smart thermostat brands, consider their brand compatibility—some brands like Nest, Ecobee, and Honeywell work seamlessly with most HVAC setups. You’ll want to verify your system’s compatibility first, but these brands are known for broad support, making installation easier and ensuring your smart thermostat functions perfectly with your existing setup.
How Do I Connect It to Wi-Fi?
To connect your smart thermostat to Wi-Fi, start with the Wi-Fi setup process in your device’s app. Make certain your router is on and within range. Enter your Wi-Fi network name and password, then follow prompts to complete the connection. If you face network troubleshooting issues, restart your router and guarantee your device’s firmware is up to date. This ensures a smooth setup and reliable connection for your smart thermostat.
Will It Work With My Existing HVAC System?
Your smart thermostat will work with your existing HVAC system if you perform compatibility checks and review wiring requirements. First, verify that your system type (like gas, electric, or heat pump) is compatible with the thermostat model. Then, carefully examine your wiring connections to confirm they match the thermostat’s wiring diagram. If unsure, consult the manufacturer’s guidelines or a professional to avoid any issues and ensure smooth operation.
How Secure Is My Data With a Smart Thermostat?
Your data with a smart thermostat is generally secure, thanks to data encryption that protects your information during transmission and storage. Manufacturers also implement privacy policies to guarantee your personal data is handled responsibly, giving you peace of mind. However, stay cautious, update firmware regularly, and review privacy policies to understand how your data is collected and used, ensuring you maintain control over your information.
Conclusion
Installing a smart thermostat is a simple way to save energy and cut costs. Did you know that using a smart thermostat can reduce your energy bills by up to 12%? Once installed, you’ll enjoy better control over your home’s temperature and increased comfort. Plus, many models can learn your habits and adjust automatically. So, go ahead—take this easy step toward a smarter, more efficient home. Your wallet—and the planet—will thank you!