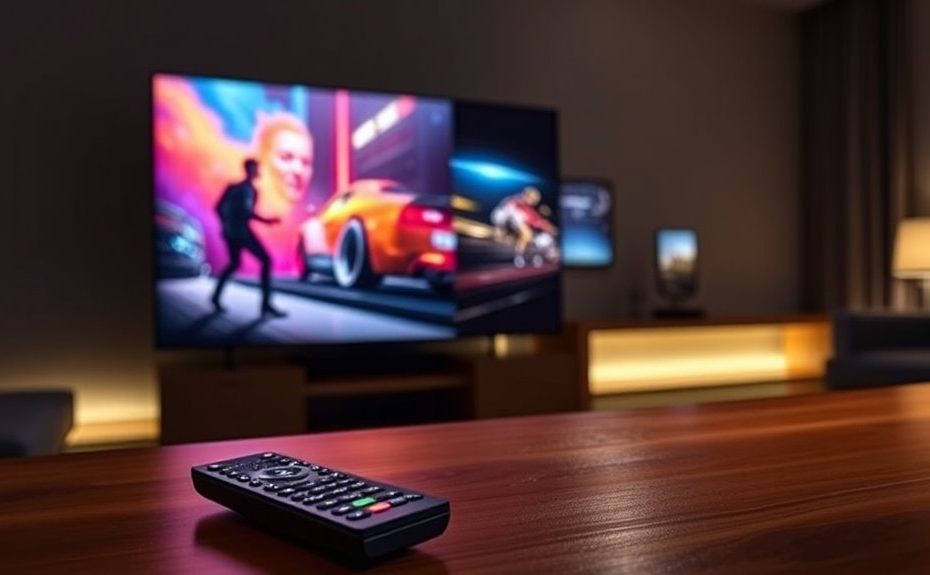
To calibrate your TV for movies and games using built-in tools, start by selecting a dedicated movie or cinema preset that offers accurate color and gamma. Turn off unnecessary enhancements like motion smoothing and dynamic contrast to preserve image quality. Use the calibration menu to adjust brightness, contrast, color, and tint for natural skin tones and proper black levels. Fine-tune these settings with test patterns and explore local dimming options. Keep in mind, maintaining these settings over time can improve your viewing experience—learn more below.
Key Takeaways
Select appropriate picture presets like Movie or Filmmaker mode for natural color and accurate gamma.
Disable motion smoothing, dynamic contrast, and noise reduction to maintain authentic image quality.
Use built-in calibration tools and test patterns to adjust grayscale, black levels, and color balance precisely.
Fine-tune brightness and contrast to optimize shadow detail and prevent clipping of whites.
Regularly review and adjust settings to maintain calibration, and consider external tools for advanced accuracy.
Choosing the Right Picture Preset for Movie and Game Viewing
When setting up your TV for movies and gaming, choosing the right picture preset is crucial for achieving accurate colors and ideal picture quality. Start by selecting modes like Movie, Cinema, or Filmmaker, which are designed for natural color reproduction and proper gamma settings. These presets typically default to a 6500K color temperature, ensuring accurate skin tones and neutral colors. Avoid Vivid, Dynamic, or Sports modes, as they boost saturation and contrast, making images look artificial. Custom or User modes let you fine-tune settings if needed, but sticking to the recommended presets provides a solid baseline for accurate viewing. Remember, these presets are optimized to minimize unnecessary image manipulation, giving you a more authentic and true-to-source picture. Additionally, color temperature adjustments can further refine the picture for optimal color accuracy.
Disabling Unnecessary Image Manipulation Features
To achieve a natural and accurate picture, you need to turn off unnecessary image manipulation features. Motion smoothing, like TruMotion or Motionflow, can create a soap-opera effect and should be disabled for movies and games. Dynamic contrast and energy-saving settings often alter the image’s appearance, reducing accuracy and causing unwanted shifts in brightness. Noise reduction and digital clean view can blur fine details, so turn those off as well. Local dimming can stay on if it improves contrast, but be aware it may cause blooming. Disabling these features helps you see the image as intended, providing a more faithful and natural picture. Additionally, understanding your TV’s best heat pump can help optimize your home’s climate control, ensuring comfort while you enjoy your movies and games. When configuring your TV, consulting manufacturer calibration guides can further enhance picture quality and ensure settings are tailored to your preferences. Being aware of image processing techniques enables you to better customize your viewing experience. Recognizing the impact of video enhancement features can prevent unwanted visual artifacts and improve overall image fidelity. Remember that professional calibration can fine-tune your display for optimal results.
Setting Brightness and Contrast for Optimal Black and White Levels
Once you’ve disabled unnecessary image manipulation features, it’s time to set your TV’s brightness and contrast levels for ideal black and white performance. Start with the brightness setting, adjusting it so that black bars or backgrounds appear dark but still reveal shadow details. Too high, and blacks look gray; too low, and shadow details vanish. Proper calibration of these settings is essential for accurate picture quality. Next, set the contrast so whites are bright without clipping or losing detail. Use a test pattern with pure white and black areas to fine-tune these settings. Recheck both after making adjustments, as they influence each other. Additionally, paying attention to black level calibration can further enhance shadow detail and contrast, resulting in a more immersive viewing experience. Incorporating automated calibration tools can also help achieve more precise and consistent settings for the best overall picture quality. Moreover, understanding how advanced display technologies affect calibration can help you optimize your settings based on your specific TV model.
Adjusting Color and Tint for Natural Skin Tones
Adjusting color and tint is essential for achieving natural skin tones that look realistic on your TV. Start by using a test pattern with a gray scale and a blue filter. Adjust the color setting so the gray boxes appear neutral through the filter. Next, tweak the tint to balance green and magenta until skin tones look lifelike. Proper calibration guarantees people on screen don’t appear unnaturally flushed or washed out. For additional accuracy, consider performance upgrades that could improve overall picture quality and color fidelity. Understanding color accuracy principles helps in fine-tuning your display settings for the most natural results.
Navigating Built-In Calibration Menus and Options
Finding the built-in calibration menus on your TV is straightforward once you understand where to look. Most menus are accessible via the remote’s Settings, Menu, or Home button. Once inside, navigate to Picture or Display options. Here’s how to proceed:
Access the Menu – Use your remote to open the main menu and select the Picture or Display section.
Find Calibration or Expert Settings – Look for options labeled Calibration, Expert, or Advanced Settings.
Locate Key Controls – Within these menus, you’ll find brightness, contrast, color, and tint adjustments.
Toggle Image Enhancements – Disable or adjust features like motion smoothing, dynamic contrast, and noise reduction for more accurate viewing.
Understand Built-In Tools – Many TVs include self-calibration features that help optimize picture quality with minimal effort. These tools often use automatic calibration algorithms to simplify the process and improve accuracy.
Using Test Patterns to Fine-Tune Your TV Settings
Using test patterns is essential for accurately calibrating your TV, as they provide standardized references to fine-tune picture settings. Begin by selecting a pattern that shows grayscale steps, which helps you set the correct brightness and contrast. Adjust the contrast so that white areas are bright without clipping, and set brightness so black bars are dark but retain detail. Use color test patterns to fine-tune color and tint, ensuring skin tones look natural. Keep motion smoothing and dynamic contrast off to avoid distortion. Recheck settings after adjustments, as changes can affect each other. Online tools, calibration discs, and free test patterns are great resources. These patterns make it easier to achieve a balanced, natural picture, improving your viewing experience for movies and games alike. For optimal results, consider monitoring your display’s performance using specialized tools to verify calibration accuracy. Additionally, understanding private equity market trends can help you anticipate technological innovations and sustainability considerations that may influence your investment decisions. Remember that calibration techniques are continually evolving, so staying updated with the latest methods can further enhance your setup.
Balancing Local Dimming and Contrast Enhancements
Balancing local dimming and contrast enhancements is essential for achieving a natural, high-quality picture. Too much local dimming can cause blooming around bright objects, while too little can make dark scenes look flat. Similarly, contrast enhancements can improve picture depth but may introduce artificiality if overdone. To get it right:
Adjust local dimming settings gradually, aiming for deeper blacks without excessive blooming.
Disable or reduce contrast enhancement features to prevent unnatural highlights.
Use test patterns with bright and dark areas to find a balance that maintains detail without halo effects.
Reassess after changing other picture settings, as they can influence the overall contrast perception.
Be aware that retail hours can impact when you might access calibration tools or professional assistance to optimize your display.
Always consider image processing features, as they can significantly influence contrast and detail perception in various viewing scenarios.
Fine-tuning these features ensures your movies and games look realistic and engaging.
Verifying and Refining Your Calibration Results
Before you finalize your calibration, it is vital to verify that your settings deliver the desired picture quality. Use test patterns or calibration discs to check black levels, contrast, and color accuracy. Look for deep blacks without losing details and guarantee whites are bright but not clipped. Observe skin tones and color fidelity to confirm natural, accurate hues. Make small adjustments to brightness, contrast, and color if needed, then recheck. Use built-in tools to fine-tune your settings, ensuring they produce consistent results across different content. Take your time, and don’t rely solely on initial impressions. Confirm that your picture remains balanced in various scenes, adjusting as necessary for ideal movie and game viewing. This process ensures your calibration is both accurate and stable. Additionally, paying attention to color accuracy can significantly enhance your viewing experience, especially for content that relies heavily on precise hues.
Tips for Maintaining Accurate Settings Over Time
To keep your TV’s picture quality consistent over time, it’s important to periodically review and modify your calibration settings. Regular checks ensure your image remains accurate as ambient lighting and content vary. Additionally, utilizing trustworthy calibration tools helps confirm your settings stay optimal over the long term. Here are four tips to maintain your settings: 1. Revisit calibration tools every few months using test patterns or built-in tools to spot shifts. 2. Adjust for ambient light** by tweaking brightness and contrast as your room lighting changes. 3. Disable auto picture adjustments like motion smoothing or dynamic contrast when watching movies or playing games. 4. Keep firmware updated, since manufacturers often release improvements that can affect color accuracy and performance. Remember that wave and wind can subtly influence how your TV performs if you are near open windows or outdoor environments. Incorporating knowledge of sound vibrations** and environmental factors can help you optimize your viewing experience and maintain consistent picture quality.
When to Consider External Calibration Tools
While regular use of built-in calibration tools can keep your TV’s picture quality decent for everyday viewing, there are times when external calibration devices become worthwhile. If you notice persistent color inaccuracies, inconsistent contrast, or uneven brightness that adjustments through menus can’t fix, a professional calibration with a colorimeter or spectrophotometer is recommended. External tools provide highly precise measurements, guaranteeing your display matches industry standards for movies and gaming. They’re especially useful if you want the most accurate color reproduction or if you’re a serious enthusiast or content creator. Additionally, when your TV’s picture seems to drift over time despite manual tweaks, external calibration can restore peak performance. Investing in these tools ensures you’re getting the best possible picture quality, beyond what built-in menus can achieve.
Frequently Asked Questions
How Often Should I Recalibrate My TV for Optimal Picture Quality?
You should recalibrate your TV every six months to guarantee the best picture quality, especially if you notice color shifts, dull images, or changes in brightness. Environmental factors like lighting, aging components, or software updates can affect image accuracy. Regular recalibration helps maintain the best settings, making your movies and games look their best. Use built-in tools or free test patterns for easy, quick adjustments, and consider professional calibration for the highest accuracy.
Can Built-In Tools Replace Professional Calibration for Serious Enthusiasts?
Think of built-in calibration tools as your trusty map on a scenic hike—they guide you well enough for casual exploration. For serious enthusiasts, they’re like a basic compass, providing decent direction but missing the precision of a professional GPS. While built-in tools improve your picture, they don’t replace the detailed adjustments and expert eye of professional calibration. If you crave perfection, consider a pro for that ultimate, cinematic experience.
Are There Specific Settings to Enhance HDR Content Using Built-In Menus?
To enhance HDR content using built-in menus, start by enabling HDR mode if available. Adjust picture presets to Movie or Filmmaker modes for accurate tone mapping. Turn off motion smoothing and dynamic contrast to preserve HDR detail. Then, fine-tune brightness and contrast with test patterns, ensuring dark areas retain detail without clipping. If your TV offers HDR-specific settings like local dimming or peak brightness, optimize them for the best contrast and color depth.
How Do Ambient Lighting Conditions Affect Calibration Accuracy Over Time?
Ambient lighting conditions can substantially impact your calibration accuracy over time. Bright rooms may make your picture appear dimmer, causing you to increase brightness or contrast, which can distort image quality. Conversely, dark environments can make your display look washed out if not adjusted properly. To maintain ideal calibration, you should regularly evaluate your lighting conditions and make small adjustments, ensuring consistent picture quality no matter the lighting.
What Are Common Mistakes to Avoid During TV Calibration With Built-In Options?
Avoid these calibration pitfalls to keep your picture sharp. Don’t rush the process; take your time adjusting brightness, contrast, and color to prevent overshooting. Never rely solely on default presets like Vivid or Dynamic—they distort accuracy. Turn off motion smoothing and other image manipulation features, or you’ll end up chasing illusions rather than true images. Ultimately, skip the temptation to tweak settings without test patterns—they’re your guiding stars for a balanced picture.
Conclusion
Once you’ve calibrated your TV, you’ll notice movies and games look more vivid and natural. For example, imagine watching your favorite film with perfect black levels and true-to-life colors—it’s like bringing the cinema home. Regularly tweaking your settings guarantees consistent quality, just like a professional calibrator would do. With a little effort, you’ll enjoy stunning visuals that truly enhance your entertainment experience every time you press play.